How to Give Your Cat a Flea Bath: Step-by-Step Guide
Share
Overview
When it comes to giving your cat a flea bath, the first step is to create a quiet and warm bathing area. Gather all the necessary supplies, and take a moment to gently acclimate your cat to this new environment before diving into the bath. You might be wondering what comes next! The process is straightforward:
- Start by wetting your cat.
- Apply a cat-friendly shampoo.
- Rinse thoroughly.
Don’t forget to provide some post-bath care to ensure your furry friend has a comfortable experience and effective flea treatment. Remember, we’re all in this together, and with a little patience, you can make bath time a breeze for both you and your cat!
Introduction
Bathing a cat can feel like a daunting task, especially when you’re faced with the pesky problem of fleas. But don’t worry! With the right approach, this necessary chore can become a manageable experience for both you and your furry friend.
In this guide, we’ll outline essential steps and best practises for giving your cat a flea bath, ensuring a gentle and effective process.
You might be wondering, what happens when your cat's instinct to resist water clashes with the need for cleanliness? Exploring techniques to calm and prepare your feline companion could make all the difference in turning bath time into a more pleasant routine.
Let’s dive in together!
Prepare Your Cat and Bathing Area
-
Choose the Right Location: When it comes to bathing your cat, it’s best to find a quiet, warm spot where they feel safe. A sink or bathtub can work wonders, just make sure it’s shallow enough to keep them comfortable.
-
Gather Supplies: Before diving into the wash, gather everything you’ll need. Here’s a handy list of essentials:
- Cat-friendly flea shampoo, ideally all-natural
- Towels for drying
- A cup or pitcher for rinsing
- A non-slip mat for safety
- A brush to detangle fur before the bath
- Treats to reward your cat along the way
-
Start by gently brushing your cat to remove any loose fur and mats. This not only makes the bathing process smoother but also helps your furry friend feel more at ease.
-
Acclimate Your Cat: Let your cat explore the bathing area at their own pace. Use a soft, reassuring voice to help them relax. Introducing them to the scent of the shampoo can also make them feel more comfortable. If your cat is particularly wary of water, try the 'purrito' technique—wrap them snugly in a towel for a sense of security while you clean them.
-
Dry Your Cat Thoroughly: After the wash, use several towels to soak up excess moisture and keep your cat in a warm room to avoid any chills. Keep an eye on them until they’re completely dry.
-
Understand Bathing Frequency: Remember, indoor cats usually don’t need baths as often as their outdoor counterparts. However, there are exceptions for those with long fur, mobility issues, or skin concerns.
We’re all in this together, and we hope these tips help make bath time a breeze for you and your feline friend. Why not give these a go and see how it goes? Cheers from our family to yours!
Administer the Bath Gently and Effectively
-
Fill the Bath: Start by filling your sink or tub with a few inches of comfortably warm water. It’s so important to steer clear of extreme temperatures, as our feline friends can be quite sensitive to both heat and cold, which might lead to discomfort.
-
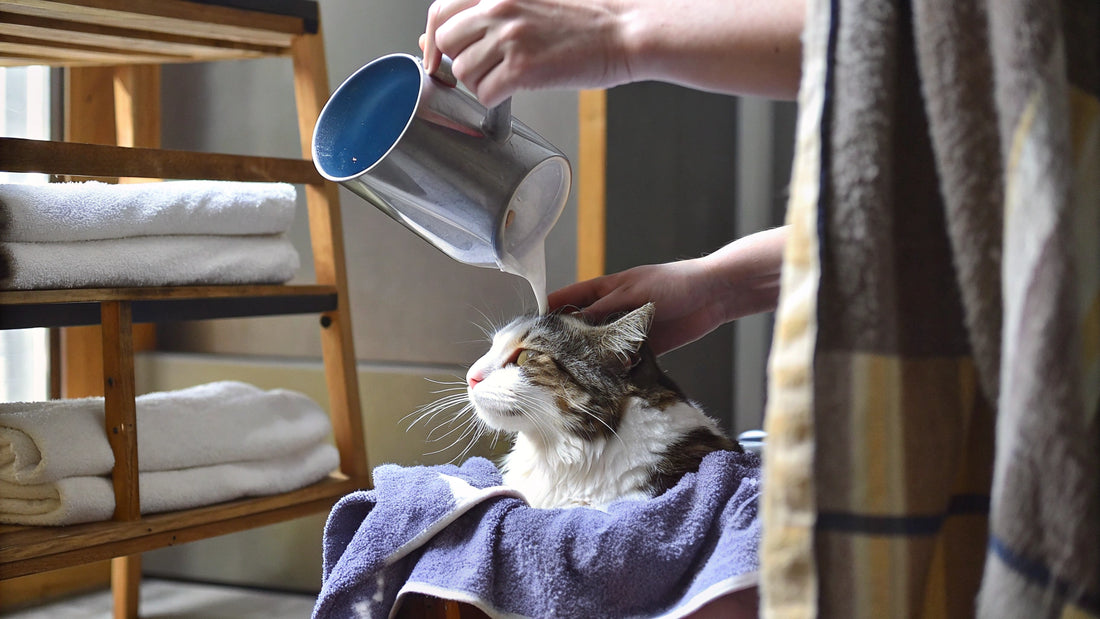
Wet Your Cat: Gently place your cat in the water, ensuring you have a secure hold. Using a cup or pitcher, pour water over their body, avoiding the head, ears, and eyes. Begin at the neck and gradually work your way down to keep stress levels low.
-
Apply Shampoo: Once your cat is nice and wet, apply a small amount of all-natural, unscented insecticidal shampoo. Lather it gently into their fur, paying special attention to those sneaky spots where fleas like to hide, such as under the arms and between the toes. Remember to avoid the face and sensitive areas to prevent any irritation.
-
Rinse Thoroughly: Rinse your cat with clean, warm water until all the shampoo is completely washed away. It's vital to ensure no residue remains, as leftover shampoo can irritate their skin and disrupt those natural oils.
-
Dry Your Cat: Carefully lift your cat out of the water and wrap them in a towel. Gently pat them dry, avoiding any vigorous rubbing that might tangle their fur. This gentle approach helps maintain their comfort and reduces stress during the drying process.
Now, it’s worth noting that many pet owners tend to wash their cats more often than necessary, which can lead to skin problems. Veterinarians suggest limiting baths to once or twice a month unless advised otherwise. Bathing can be quite distressing for our furry companions, so it should really only be done when absolutely necessary. And don’t forget, year-round pest control is essential to prevent re-infestation, even after bathing. By following these best practices, you can create a more pleasant cat flea bath experience while effectively tackling those pesky flea issues.
So, have you noticed any flea troubles lately? Why not give these tips a go? Cheers from our family to yours!
Care for Your Cat After the Bath
-
Keep Them Warm: After the wash, why not wrap your cat in a warm towel? This simple act helps retain their body heat. Cats can get chilly quickly when wet, so it’s really important to place them in a cosy environment to prevent any shivers—especially for those hairless breeds that feel the cold more.
-
Monitor for Stress: Keep an eye on your furry friend for any signs of stress or discomfort. If they seem a bit agitated, creating a quiet space for them to relax can work wonders. Gentle petting and soothing words can significantly help calm them down, making the whole experience much more pleasant.
-
Reward with Treats: After the wash, treat your cat to a little something special or their favourite toy as a reward for their cooperation. This positive reinforcement is so important! Did you know that over 70% of pet owners reward their pets after grooming? It helps them associate bath time with enjoyable experiences. As Dr. Amanda Chambers, a veterinarian, says, "Make it a positive experience with treats and soothing words."
-
Cheque for Parasites: A few hours after the bath, it’s a good idea to cheque your cat for any lingering pests. If you spot any, you might need to repeat the cat flea bath or chat with your vet about further treatments to ensure effective flea control.
-
Hydration and Nutrition: Don’t forget to ensure your cat has access to fresh water and their regular food. Bathing can be a bit stressful, and they might need some time to rehydrate and settle back into their routine. Creating a calm environment with familiar comforts can really help them recover after their bath.
So, let’s explore this step by step together! Have you tried any of these tips before? We’re all in this together, and we’d love to hear how it goes. Cheers from our family to yours!
Conclusion
Bathing your cat, especially for flea control, might seem like a daunting task, but it's essential for keeping your furry friend healthy and comfortable. In this guide, we've shared the steps to make the process as smooth and stress-free as possible—from preparing the bathing area and gathering supplies to giving the bath and providing care afterward.
Choosing the right spot for the bath is crucial, and we recommend using cat-friendly products and gentle techniques to keep your cat calm throughout the experience. Remember, it’s all about making bath time a positive experience! After the bath, proper care is vital to help your cat recover comfortably and build positive associations with bath time.
By following these best practises, you can tackle flea issues effectively while ensuring your cat stays relaxed and safe. Just a friendly reminder: bathing should be done sparingly and only when necessary, paired with regular pest control measures. Why not embrace these techniques and make bath time enjoyable for both you and your beloved companion? You’ll find peace of mind in knowing your cat is flea-free and happy. Cheers from our family to yours!
Frequently Asked Questions
What is the best location for bathing my cat?
The best location for bathing your cat is a quiet, warm spot where they feel safe, such as a sink or bathtub that is shallow enough to keep them comfortable.
What supplies do I need to bathe my cat?
You will need the following supplies: cat-friendly flea shampoo (ideally all-natural), towels for drying, a cup or pitcher for rinsing, a non-slip mat for safety, a brush to detangle fur before the bath, and treats to reward your cat.
How should I prepare my cat before the bath?
Start by gently brushing your cat to remove loose fur and mats. Allow your cat to explore the bathing area at their own pace, use a soft voice to help them relax, and introduce them to the scent of the shampoo. If your cat is wary of water, consider using the 'purrito' technique by wrapping them snugly in a towel for security.
How should I dry my cat after bathing?
After washing, use several towels to soak up excess moisture and keep your cat in a warm room to avoid chills. Monitor them until they are completely dry.
How often should I bathe my cat?
Indoor cats typically do not need baths as often as outdoor cats. However, exceptions may apply for cats with long fur, mobility issues, or skin concerns.